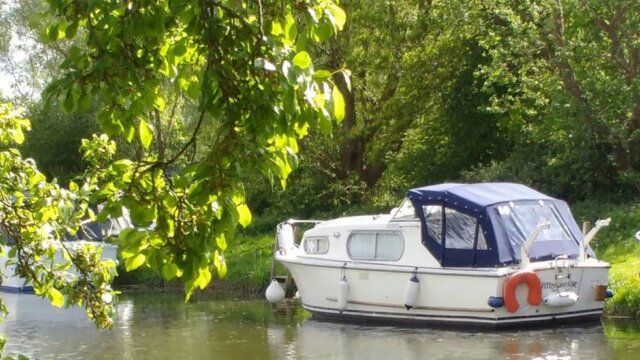
Fitting a new Nauticover canopy to a Freeman 23
- By F23 flittermouse - RIP
- 3135 views
Replacing a full canopy supplied by Nauticover on a Freeman 23
General Notes: (not in any order)
>Ignore the critics that say their canopies will be wrong because they only copy the old one, make no allowance for shrinkage etc etc
>Adverse comments, There are some comments regarding well known competitors quality leaving a lot to be desired, so it’s not exclusive !
>Every time I've rung Phil (the proprietor) up, he couldn't have been more helpful.
>They don't fit the canopy...... True, but against that up to the 50% extra costs that competitors charge can be saved by a couple of days CAREFUL final fitting ( free ! )
>The new canopy only needs the rear turn button eyelets positioning and installing to suit the existing spacing (As Fred who was putting them on in 1960 mounted them freehand, so everyone will be different !!
>Timeframe way in front of competitors (when I ordered)
>If you don't have an eyelet cutter, hire one from Nauticover for a fully refundable deposit when you return it.
>Make yourself a mobile cutting block anvil out of a heavy piece of wood, hardwood preferably. (mine was from a 12”long 3” Square oak fencepost)
>The opening overlaps could have been a bit more generous in my opinion, but just ask Phil beforehand is the motto. In view of this he send me some free material to material press studs to close the gaps but not enough width available to neatly fit, (again my opinion).
I will probably sew on some Velcro patches instead !
Procedure
1. Temporarily tie the roof bars as near as possible in their raised position with thin rope, starting from the windscreen and finally tying off at the stern.
2. Drape the canopy (minus side panels) over the roof bars and adjust until it's equally positioned all round and then wrap the Velcro canopy ties/ to roof bars into position.
2A. Temporarily button on the side panels to check they all fall nicely into place. (Nauticover will have matched eyelets and turn button top/sloping/side positions to suit your new canopy/opening arrangements) Then remove them once happy all is ok.
3. Tack the front of the canopy to the wooden window battens (copper tacks) ensuring you are central and have the required weather overhang. (This assumes you have the removable battens and not for instance lift the dot fixings onto a fixed batten.) Don't worry about the 'Hidem" tape or the outside corners at this time.
4. Slacken the rear roof bars a shade (assuming you have the optional slider kit fitted)
4a. If you have fixed pivot roof bars, you will need to undo the Velcro canopy tie and pull the support forward a little to slacken the tension
5. Adjust the temporary rope ties to suit the erected canopy
6. Starting at the centre of the rear coaming, apply tension and mark the eyelet position and cut and insert the first eyelet. Maintaining slight tension outward and downward work outwards each way alternatively.
7. Rehang the side curtains on the canopy top/slope. Depending on your fixing method at the coaming, (continuous bungee/ Individual pull downs/turn buttons) check the sides pulls down evenly and don't 'bag'
8. Final touches such as the 'Hidem" tape and the corner tuck on the batten ends can be done now.
9. Remove the temporary rope ties
10. Zip up and tension the side panels, checking the existing hook positions pull the sides evenly and squarely down if this is your system. I used individual turn buttons (supplied), as shown on the pictures along the bottom as I also had ordered zip out doorways and continuous bungee tensioners wouldn’t work
11 There probably will be a need to install one eyelet on the bottom corner of the triangular rear side panel, this doubles up with the last eyelet position from item 6 and forms the corner overlap.
12. Tension the canopy fully (with the movable roof bars ?) to check all is well. There may be a need if you haven't got one or two fixing 100%, to move the existing turn buttons slightly. At worst this entails two extra small holes and filling the old holes with gelcoat filler, it may even be possible to reuse one of the holes anyway.
13. Stand back and admire your new Nauticover canopy and congratulate yourself on the money you have saved !!!
Following an idea from another 23 owner, I have installed two continuous webbing straps fixed to each bar and made off at the rear coaming with buckle adjusters. This has two advantages, it keeps the canvas from sagging between the bars by maintaining roof bar position, and when you lower or raise the canopy the whole thing goes down and more importantly comes up like an opening fan !
I will add some photos of the canopy being fitted later (I appear to have lost them in the depths of Cloud storage!!)
Not sure if they can be added here otherwise in my personal album


