Spiderman Mask Cosplay Tutorial by Snorlaxprime
- By Sai
- 3174 views

Step 1: Materials


Here are the list of the materials:
1. Cardboard
2. Red stretchable cloth (optional)
3. fishnet
4. glue
5. small magnet x4
6. evo foam
7. black marker
8. hot glue gun
I am following the build instruction from dali-lomo blog. So we don't have to re-invent the wheel. This is done using cardboard and hot glue gun. Once you had completed the build, you should have something similar to the picture that I have.
Add TipAsk QuestionCommentDownload
Step 2: Making the Eye


 3 More Images
First make the eye outline from tracing the helmet that you had made. I use some reference picture. Then cut the evo foam to follow the shape. Cut the fishnet, I get mine from the garlic holder, it is a great way to recycle it. Trace the eye along the fishnet and cut it as per the shape of the eye.
Then glued the fishnet in between the cardboard layout and the black evo foam
Add TipAsk QuestionCommentDownload
Step 3: Install the Magnet for the Eye


I am using 4 small screws and 4 small magnets. The magnets goes into the helmet, two for each eye. The screw goes to the cardboard of the eye.
Test fit it into the cardboard helmet. You might have to make some adjustment to the location of the magnet in the helmet. If you done it correctly you should have a nicely fit eye.
Add TipAsk QuestionCommentDownload
Step 4: Cloth Mask(Optional)


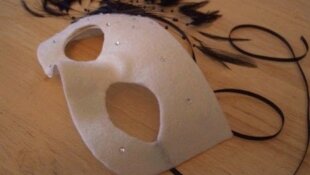
For the soft cloth mask, I am using the attached template. I can't remember whereI had downloaded the template, it could be from the same dali-lomo blog. I bought a sweat shirt from Target for this purpose. You want to use the stretchy material to make sure that you can wear it when you are done.
There is a little bit of trial and error as you can see to make sure it fit.
Attachments
 spiderman_custom.pdf
Add TipAsk QuestionCommentDownload
Step 5: Drawing the Web Lines


 3 More Images
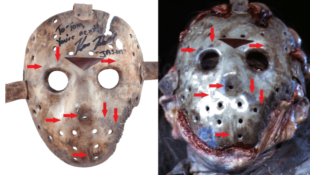
I am using a few reference picture to draw the web lines. I also use a balloon as the dummy to make the drawing process easier, to check the alignment of the lines to ensure the left and right lines all lined up.
Add TipAsk QuestionCommentDownload
Step 6: Fit the Cloth Mask to the Cardboard Mask


Once you are happy with the lining of the web on the cloth mask, it is time to fit it to the card board mask. You can use the craft glue to make sure it stick together nicely. The second picture shows the side view. Please make sure you test the alignment before glueing it all together.
Add TipAsk QuestionCommentDownload
Step 7: Finishing Touch


Now that you had attached the soft mask to the cardboard mask, you can stick the eye to the magnet. This will complete the helmet build.
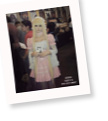
I had also build a small soft mask using the left over material that I have for my daughter and I attached it here to show the pattern of the web.
I hope you enjoyed the build as much I enjoy building it myself. Please subscribe and leave me a comment if you like this post and don't hesitate to ask me any questions that you might have.