Bat Pack Tutorial
- By Sai
- 1838 views
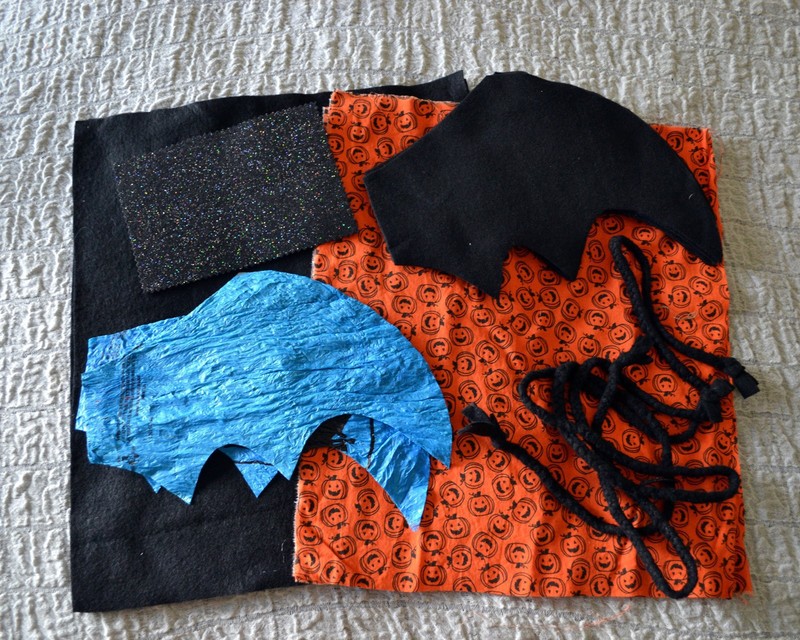
You Will Need
5 x7" Piece Of Felt For Pocket (Optional) 14 x16" Pieces Of Outer Fabic (Fleece , Chenile, Pvc, Faux Fur, Etc.) 14 x16" Pieces Of Lining Fabric Wings Cut From Outer Fabric(See Instructions) Wings Cut From Lightweight Interfacing (See Instructions) 2 yd Cording
 Step 1
Gather Your Supplies:
*Use the wing template to cut out four pieces of outer fabric and two pieces of lightweight interfacing for the wings.
*I like my crafts to be eco friendly so I use fused plastic grocery bags as interfacing, but store bought interfacing will also work.
 Step 2
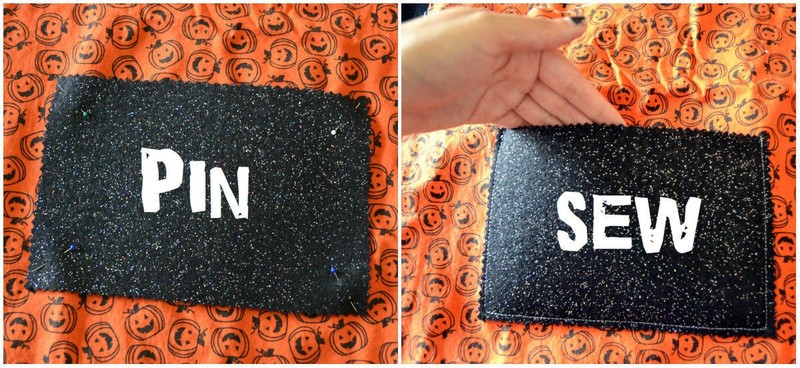
There are many ways to create pockets. I went with the laziest way. Pin your 5x7" piece of felt to one piece of your lining fabric and sew along the sides and bottom, leaving the top open to form a pocket.
 Step 3
Pin your lining pieces with the right sides facing together and and sew the sides and bottom using a 1/2" seam allowance. Leave a 4-5" opening in the middle of the bottom seam. Set aside.
 Step 4
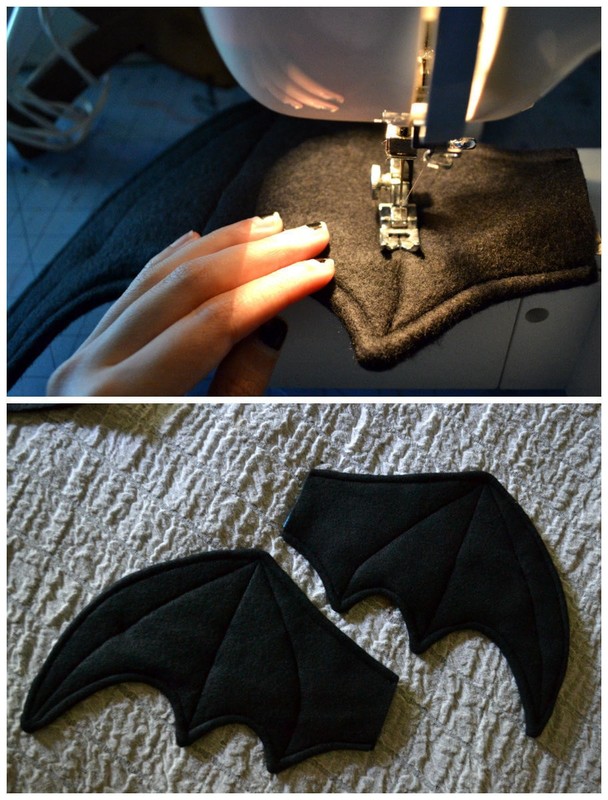
Pin two of your wing pieces together and sew around the edge using a 1/4" seam allowance. Leave the inner edge of the wing open. Repeat with the other two wing pieces, and turn your wings right side out.
 Step 5
Insert one interfacing piece into the wing, using your fingers to make the shapes match up and making sure everything lies flat. You may need to trim your interfacing to make it fit. Repeat with second wing.
 Step 6
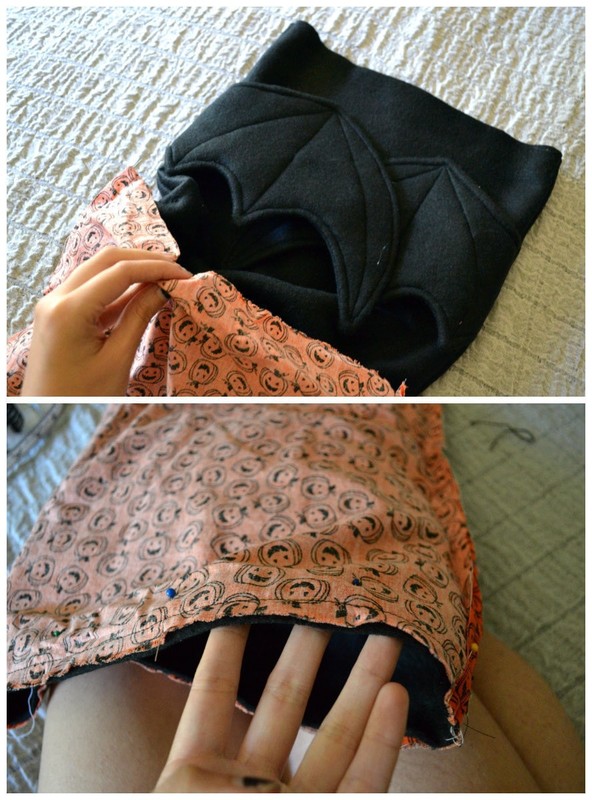
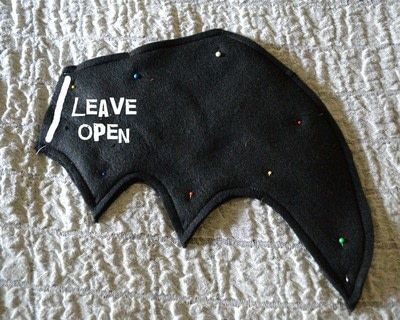
Next you're going to topstitch your wings. This is decorative as well as functional, as it keeps the interfacing in place so it doesn't bunch up and make your wings lumpy. Stitch 1/4" in around the edges of your wing. Then, starting from the top point of the wing, stitch three curved lines to each of the bottom points (see photo). You can freehand this or draw your lines with chalk if you prefer.
 Step 7
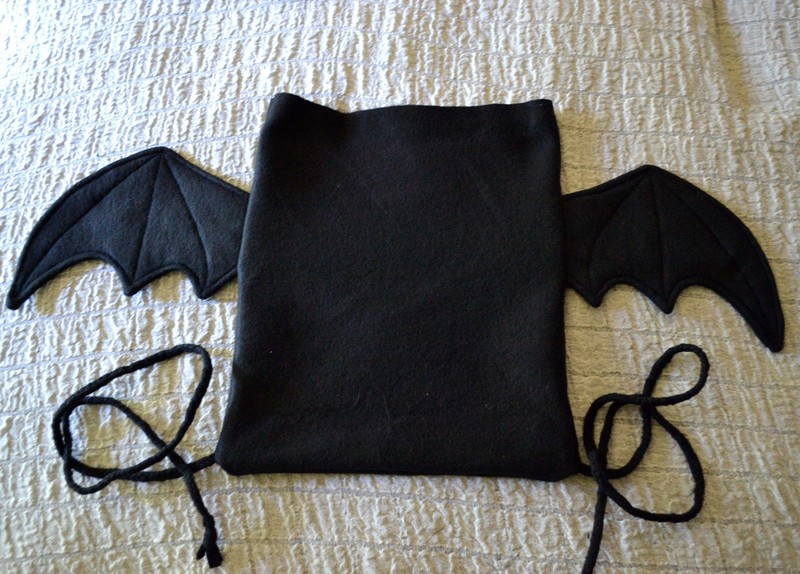
Arrange your wings and two one yard pieces of cord on top of one piece of your outer fabric as shown. Top with the second piece of outer fabric with right sides facing, and pin. Sew the sides and bottom with a 1/2" seam allowance. You do not need to leave an opening in the bottom like you did with the lining.
 Step 8
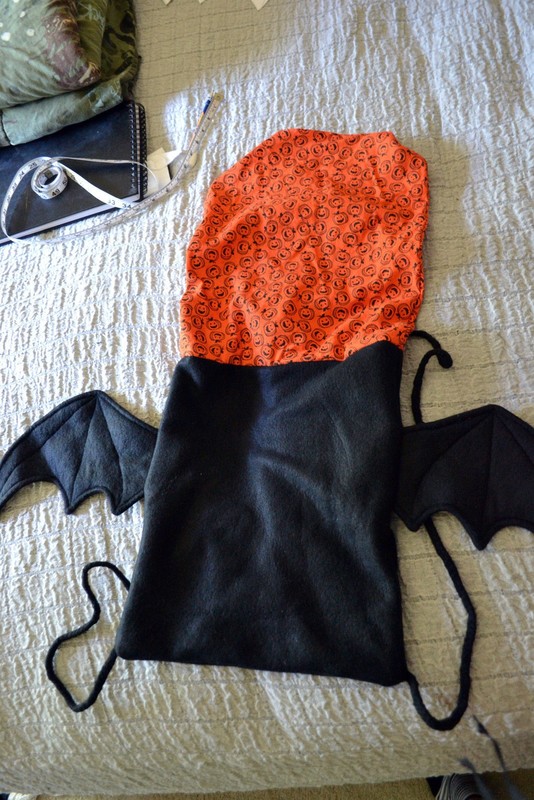
Your bag should look like this when you turn it right side out.
 Step 9
Now you're going to put the outer shell of the bag inside of the liner, with right sides facing. Fold the wings flat and place the bag inside of the lining. Match up the top edges and pin, then sew all the way around the top edge with a 1/2" seam allowance.
 Step 10
Find the opening you left in the bottom of your lining fabric and pull the entire bag right side out. It should look like this.
 Step 11
Pin the opening and sew it shut.
 Step 12
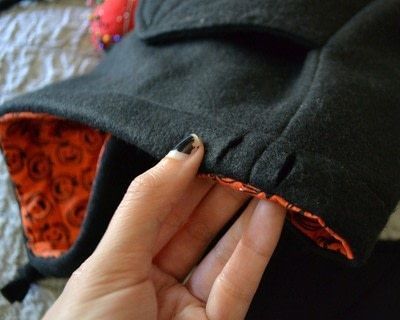
Push the lining inside of the bag, then sew around the top 1" from the top edge. This will create the channel for the drawstring.
 Step 13
Make a small slit on either side of the side seam. Repeat on other side so you have four slits total.
 Step 14
Take one end of one piece of cord and feed it into the front slit on the same side. Feed it through the channel and out of the opposite side. The easiest way to do this is to attach a safety pin to the end of the cord and push it through the channel. Do the same with the other piece of cord, feeding it through the back side of the channel and out of the opposite side this time. Pin these down, pull your bag closed and try it on. Adjust the straps to your liking and trim off any excess. I shortened mine by a few inches.
 Step 15
Stitch your cord down about 1/4" from the end slits, backstitching several times for reinforcement.
 Step 16
You're done! Feel free to embellish your batpack with pins, patches, studs, etc.