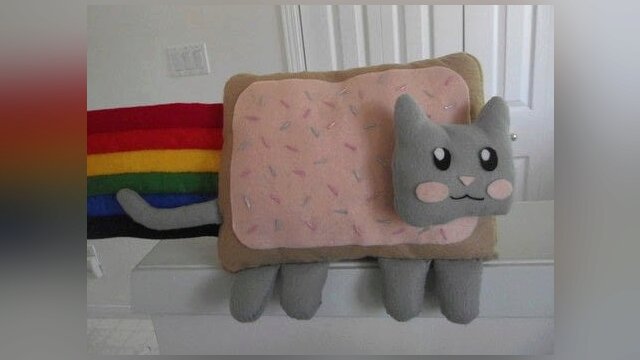
Nyan Cat Plushie
- By Sai
- 1765 views
You Will Need
1 Grey Felt Grey, Tan, & Pink Thread Red, Orange, Yellow, Green, Blue, Purple Felt 1 Pink Felt Velcro Stuffing Ruler Fabric Glue Pink & BlueBugle Beads BlackEmbroidery Thread Black & WhiteFelt Needle Or Sewing Machine 3 Tan Felt Pin(s) Scissors
 Step 1
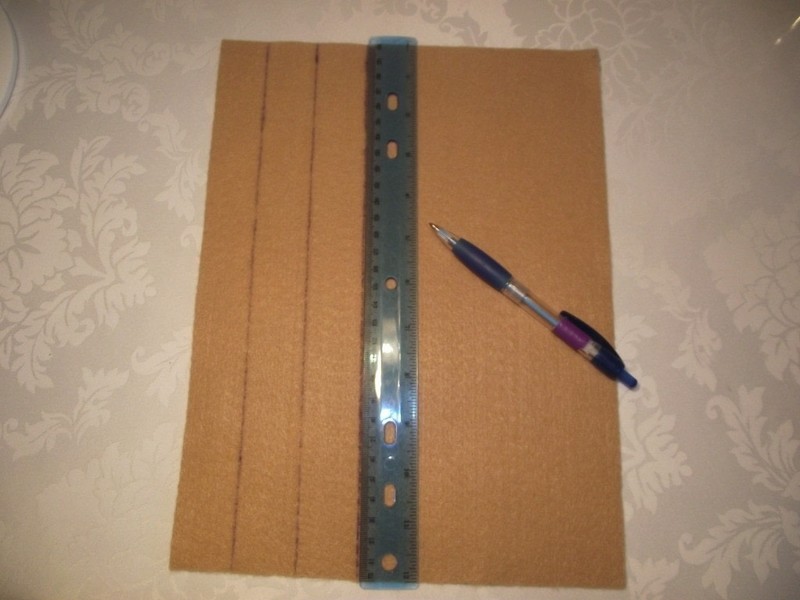
Draw 4 ruler width strips on the long side of a piece of tan felt. Cut them out.
 Step 2
Sew the 4 strips together end to end. The easiest way to do this is to place two strips back to back evenly and sew one end so that you have a bad side and a nice side with a nice seam. Sew them into one long strip, NOT A CIRCLE!!! Set this strip aside
 Step 3
Take out your full sheet of pink felt, a ruler, and a pen. Make a ruler width border around the whole sheet.
 Step 4
Cut the border off and discard it. Round the edges of the new pink rectangle. Set it aside with your tan strip.
 Step 5
Print off the head pattern or draw your own. You may need to play around with the enlarging to get the right size head. Cut the paper head pattern out and trace it twice onto the grey felt. Cut it out.
 Step 6
Pin the two grey head pieces together with the marked up/bad side facing out and pin together. Sew around it with grey thread, leaving a hole to turn it inside out.
 Step 7
Turn inside out and stuff. Sew hole closed.
 Step 8
You could do this next step before you sew it up, but I did it after. Use black embroidery floss to sew on a mouth by going in on a discreet spot and loosly making two U shapes.
 Step 9
Cut out the facial features and glue on with fabric glue or sew on. Set the head aside.
 Step 10
Again, print off the tail pattern enlarging or shrinking until your pleased. Cut out and trace onto grey felt. Cut out.
 Step 11
Fold the grey tail piece in half with the bad side facing out. Pin and sew around leaving a space to turn inside out.
 Step 12
Turn inside out, stuff, and sew. Set aside.
 Step 13
Here is the part that is hard to explain. I didn't use the patterns legs, but you can. Instead I drew my own pattern and set it with the body and head to see if I liked it. So you can choose either way.
 Step 14
Trace the leg pattern onto grey felt 8 times, remembering to do it 4 times on one side then flip the pattern for the other 4.
 Step 15
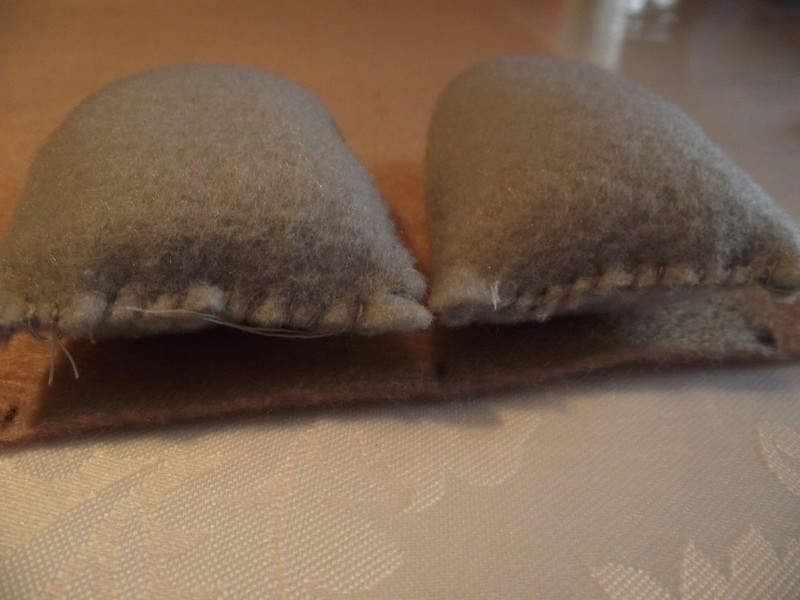
Cut them out. Pin two bad side pieces together, sew around leaving a hole, flip it inside out, stuff it, then sew the hole up. Repeat for all 4 legs. I suggest the hole being the top flat edge be the hole, since it won't be seen.
 Step 16
Lay the tail and legs out on one piece of tan felt where you want it to be when done.
 Step 17
Carefully fold the legs and tail inside the piece of felt as shown in the picture. Pin into place.
 Step 18
Another picture showing step 17.
 Step 19
Take your tan strip and lay it along an edge of the large piece of tan felt with the legs and tail pinned. Leave about 1 1/2 inch piece and start sewing from there. Sew around the whole thing until you get to the tail or a leg.
 Step 20
When you get to a leg or tail, sew across normally then sew backwards across, then go straight and keep sewing normally. This will ensure that it is firmly sewn on.
 Step 21
When you get to the end, cut off the rest of the tan strip leaving about 1/2 and inch un-sewn.
 Step 22
Sorry if this part is confusing. Sew the two ends together so the stitches will be on the same side as the other stitches.
 Step 23
This is what it should look like flipped right side out.
 Step 24
Leave it the wrong way out and...
 Step 25
Place the other sheet of tan felt on top and sew the strip to it too, leaving a hole big enough to flip inside out.
 Step 26
Flip it inside out.... :3
 Step 27
AND STUFF!!! Then close the hole by tucking some fabric on each side of the hole in and using tiny stitches with tan thread. Set the body aside.
 Step 28
Now take out your bugle beads. Any colour will work, I just happened to have pink and blue handy. Also take out the pink felt you cut and rounded.
 Step 29
Sew or glue the beads all over randomly on your pink felt (on the good side). I sewed each one individually. Place the head on to figure out where no beads are needed.
 Step 30
And this is my back. See how all the threads are tied and clipped so none hang out or leave bulges in the fabric.
 Step 31
Use fabric glue (I used elmers white glue because I ran out of fabric glue. So far it is holding very well. :3) To attach the icing to the body. LET DRY! Do not rush. Make sure to smooth all bubbles and wrinkles out.
 Step 32
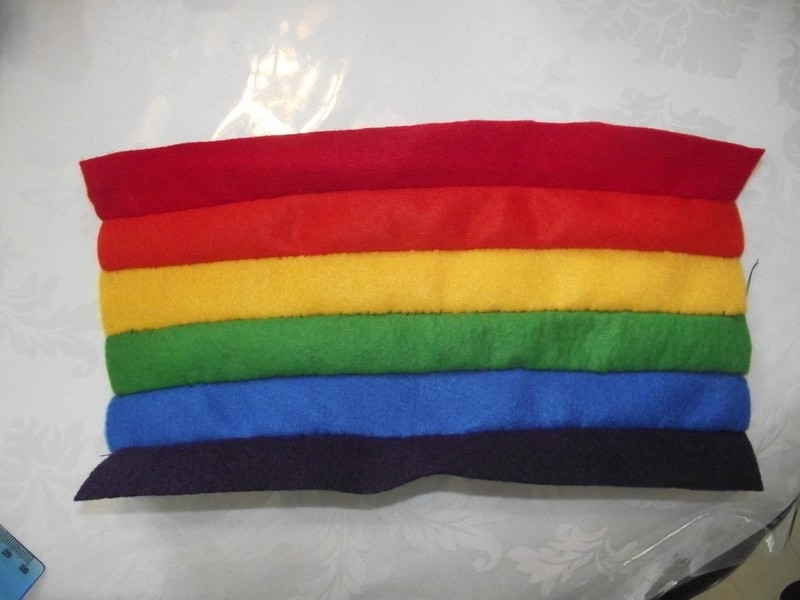
While its drying you can work on the next step. Take out the red, orange, yellow, green, blue, and purple felt. Cut one ruler width strip from each piece (on the long edge) The order in the picture is how nyan cats rainbow goes, except I substituted the second blue for purple.
 Step 33
Sew the pieces together with all the bad sides on one side. Pin and sew on one side, then unpin and pin the next strip, and repeat.
 Step 34
Should look like this on the good side.
 Step 35
Either sew the rainbow to the back or for a removable version sew on velcro to the rainbow and back.
 Step 36
Sew or hot glue (lol) on the head.
 Step 37
YAY! Your done! That wasn't so hard, was it? *pats on back* Now go take some pictures with him! :D Hope you enjoyed my tute.